• Skip to primary navigation
  • Skip to main content
  • Skip to primary sidebar

Simply Designing with Ashley

  • DIY
  • Oils
  • Recipes
  • Craft
  • Travel
  • Decor
  • Holiday
  • Navigation Menu: Social Icons

    • Email
    • Facebook
    • Instagram
    • Pinterest
    • Twitter
    • YouTube
menu icon
go to homepage
search icon
Homepage link
  • DIY
  • Oils
  • Recipes
  • Craft
  • Travel
  • Decor
  • Holiday
    • Email
    • Facebook
    • Instagram
    • Pinterest
    • Twitter
    • YouTube
  • ×

    Home » Craft » Lemon Head Topiary

    Lemon Head Topiary

    Published: Aug 22, 2012 · Modified: Aug 22, 2012 by Ashley Phipps · 280 words. · About 2 minutes to read this article. · 5 Comments · This post may contain affiliate links · This blog generates income via ads and sponsored posts · This blog uses cookies · See our privacy policy for more info Filed Under: Craft

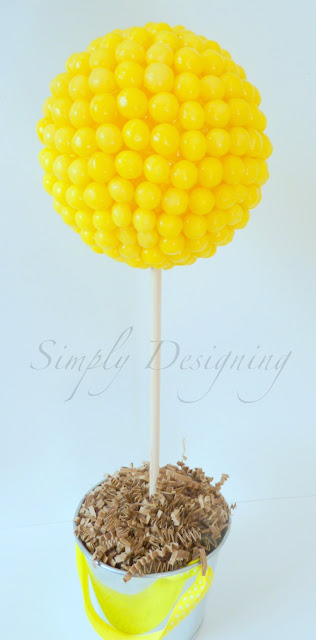
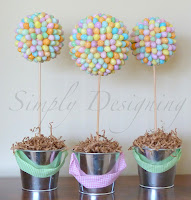
    Is it really any secret that I love Topiaries!?  I have made a lot of topiaries over the last couple of years...and a even have a couple more up my sleeves to share with you!  But today I wanted to share a bright, fun and SIMPLE Topiary that you can make with Lemon Heads!!

    Being inspired by my Jelly Bean Topiaries, I went on a hunt for fun, bright candies that I could turn into another fun Topiary and when I found Lemon Heads, I knew we were meant to be!

    Topiary + Candy = Meant to Be

    Just sayin'

    In my typical Topiary Fashion...You Will Need:

    • Styrofoam ball (I used 4")
    • Lemon Heads (I used 4-5 packs)
    • Yellow craft paint, foam brush
    • Hot glue and lots of glue sticks
    • Wooden Dowel
    • Extra Styrofoam to container
    • Pail or some sort of container (I usually find my pails from the $1 section at Target)
    • Shredded paper (or other filling for bottom) (I usually get mine from the $1 Store)

    Here's the How To:

    1. Paint foam ball with yellow craft paint (it doesn't need to be perfect, just get some color on there)
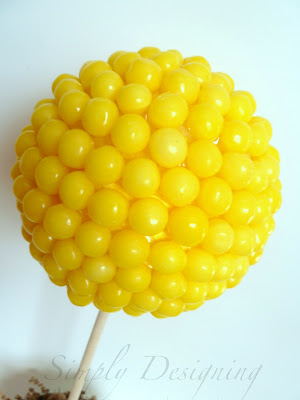
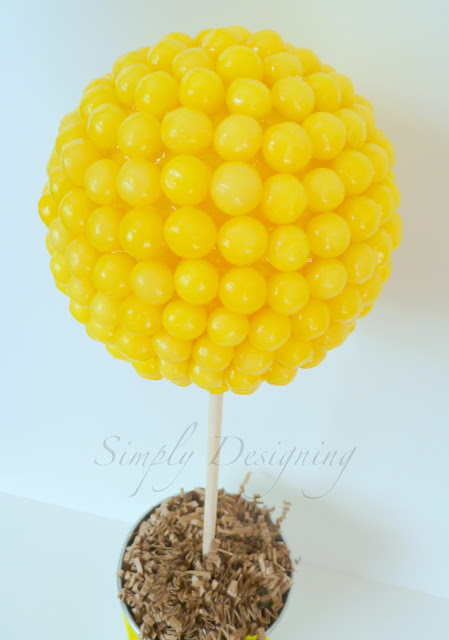
    2. Using plenty of hot glue, attach lemon heads, one at a time, close together, all over the foam ball.
    3. Leave an open spot at the bottom big enough for your wooden dowel.
    4. Using lots of hot glue, insert your wooden dowel into the bottom of the Styrofoam ball.
    5. Firmly press extra Styrofoam into pail or container, use hot glue to secure it in place.
    6. Insert other end of wooded dowel into Styrofoam in container and secure with hot glue.
    7. Cover foam with shredded paper or other filling.

    Happy Topiary Making!

    You might also like some of my other Topiaries:
        

    I participate in the link parties found here.
    Subscribe to Simply Designing by Email

    Previous Post: « Tell All Tuesday: Off to my closet to cry...
    Next Post: No-Sew Super Hero Cape {VIDEO} »

    Reader Interactions

    Comments

    1. Hannah Hathaway

      August 31, 2012 at 9:39 am

      Cute! I wanted to do an actual edible version with lolly pops!<br /><br />Great for parties! <br /><br />I would love it if you could stop by my blog and check out my party tutorials!<br /><br />welivedhappilyeverafter.blogspot.com<br /><br />

      Reply
    2. Jill

      September 04, 2012 at 8:46 pm

      Gorgeous!!<br /><br /><br />Thanks for linking to a Round Tuit!<br />Hope you have a fabulous week!<br />Jill @ Creating my way to Success <br /><a href="http://www.jembellish.blogspot.com/&quot; rel="nofollow">http://www.jembellish.blogspot.com/ </a><br />

      Reply
    3. Gail Purath

      September 04, 2012 at 10:57 pm

      This is really pretty...love anything lemony. Gail (BibleLoveNotes.com)

      Reply
    4. Daisy Pink Cupcake

      September 07, 2012 at 3:20 am

      Now this looks cool!! <br />Daisy

      Reply
    5. michelle kelly

      September 08, 2012 at 9:59 pm

      Oh my goodness! I so love ALL your topiary creations! This one is so bright and beautiful. <br /><br />Thanks for sharing on Teagan&#39;s Travels&#39; Destination: Inspiration link up!<br /><br />Blessings, Michelle<br />This is so true! So often we can fall into a Sunday morning routine, expecting our spiritual nourishment to be filled in a few hours by the church feeding it to us. Seek and ye

      Reply

    Leave a Reply Cancel reply

    Your email address will not be published. Required fields are marked *

    Primary Sidebar

    Hello Friends!

    Ashley Phipps Simply Designing I'm Ashley Phipps and I love sharing SIMPLE DIY, home, travel, food, craft and essential oil ideas with you! Learn more about me here. Contact me here. Find Media/PR info here. Privacy is important to us. Please read my Privacy Policy.

    Favorite Posts

    Spring Print - Spring is in the Air - Free Hand Lettered Print for Spring

    Free Hand Lettered Spring Print with Floral Wreath

    Spring Berry Basket - such a simple addition to your spring or Easter table

    Spring Berry Baskets


    COPYRIGHT: You’re welcome to link to Simply Designing or use a single image with a brief description to link back to any post. Republishing posts in their entirety is strictly prohibited.  Any use for commercial purposes is strictly prohibited. Feel free to pin on Pinterest. Find out more in my Privacy Policy.  Simply Designing with Ashley Phipps LLC is a participant in the Amazon Services LLC Associates Program, an affiliate advertising program designed to provide a means for sites to earn advertising fees by advertising and linking to Amazon.com . Simply Designing with Ashley Phipps LLC and it’s owner, employees and affiliates are not liable in any way for injury or loss (whether physical, emotional, monetary or any other kind of loss) resulting from any inspiration, ideas, directions or information gained from this website. We advise you to always follow manufacturer instructions, take appropriate safety precautions and hire a professional when in doubt. We love it when you use our site for inspiration, but by using it, you agree that you do so at your own risk.

    Privacy Policy 

    Copyright © 2021