• Skip to primary navigation
  • Skip to main content
  • Skip to primary sidebar

Simply Designing with Ashley

  • DIY
  • Oils
  • Recipes
  • Craft
  • Travel
  • Decor
  • Holiday
  • Navigation Menu: Social Icons

    • Email
    • Facebook
    • Instagram
    • Pinterest
    • Twitter
    • YouTube
menu icon
go to homepage
search icon
Homepage link
  • DIY
  • Oils
  • Recipes
  • Craft
  • Travel
  • Decor
  • Holiday
    • Email
    • Facebook
    • Instagram
    • Pinterest
    • Twitter
    • YouTube
  • ×

    Home » Craft » DIY Covered Buttons for Pins and Magnets

    DIY Covered Buttons for Pins and Magnets

    Published: Jul 30, 2013 · Modified: Jul 30, 2013 by contributor · 659 words. · About 4 minutes to read this article. · 3 Comments · This post may contain affiliate links · This blog generates income via ads and sponsored posts · This blog uses cookies · See our privacy policy for more info Filed Under: Craft

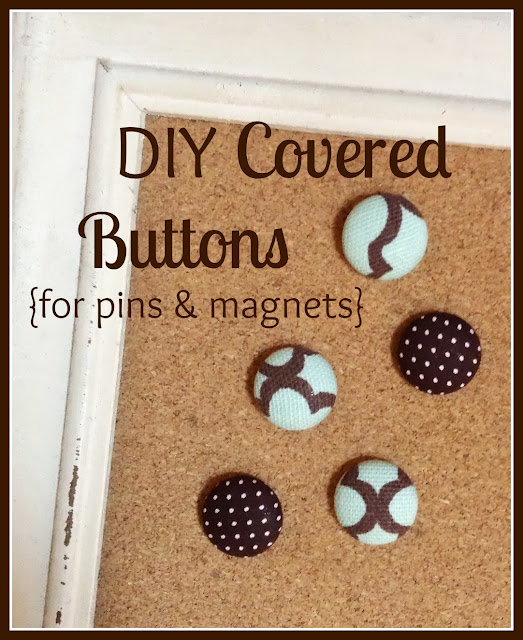
    We've arrived at our new town and have settled into our temporary apartment (sort of). Moving is hard! It has been important to me to have things seem as homey as possible to make the transition a little easier. For me that means little touches and pretty things to make this unfamiliar place feel more like home. Most of my craft supplies are in storage and shopping is limited here in our small town so I needed an easy project. The solution? I whipped up these pins and magnets in just a few minutes with materials found at the local big-box store.
     

    I'll show you how!

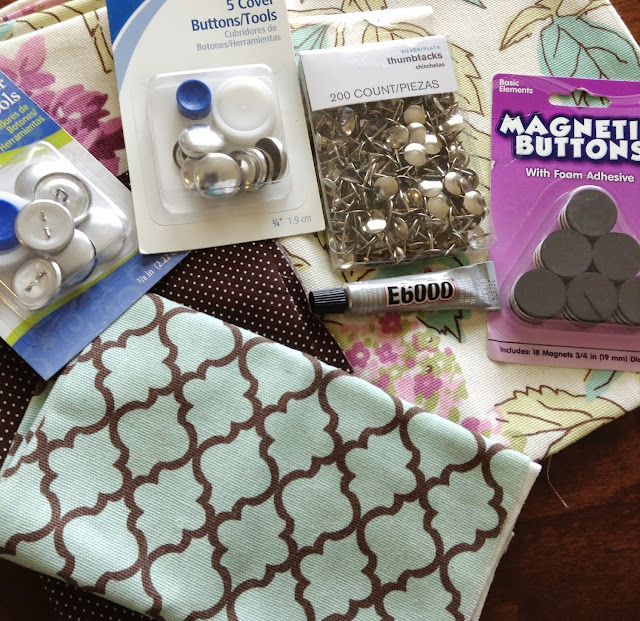
    You will need:
    -Fabric of your choosing (scraps work great)
    -Covered button kits (available in the notions aisle of fabric and craft stores. I bought button kits in ¾" size for my thumbtacks and ⅞" size for my magnets)
    -Flathead thumbtacks
    -Adhesive magnetic buttons (¾" size works perfectly for the ⅞" buttons)
    -E6000 adhesive (or other glue)
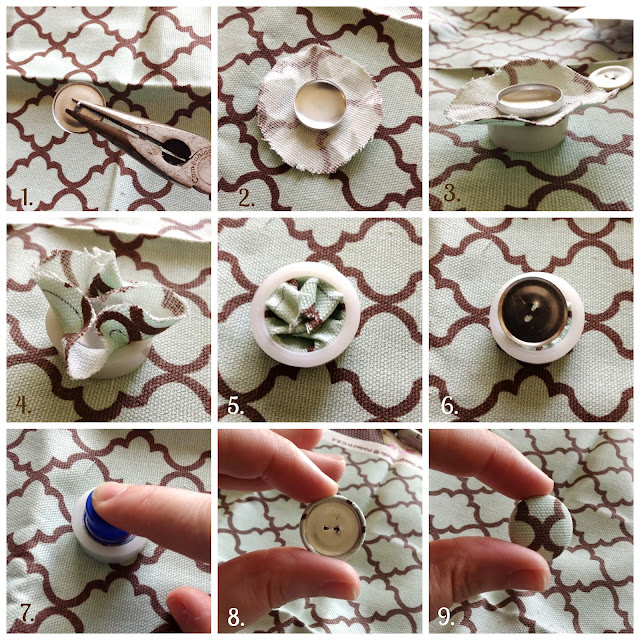
    Start by covering your buttons. 
    1. Each button will have two parts: a front and a back. Remove the shank from the back of the button with pliers. Just kind of pinch and bend and pull and the shank should come off fairly easily.
    2. Cut a piece of fabric roughly twice the diameter of the button you are covering. It doesn't have to be perfect. It doesn't even have to be a circle. Just allow enough material to easily cover the front of the button and overlap on the back.
    3. Sandwich your fabric, wrong-side up, between the white part of the covered button tool and the front of the button, with the rounded side facing downward.
    4. Push the fabric and button front down into the white flexible part of the covered button tool. Trim any extra fabric so that the back of the button will go on easier.
    5. Fold the fabric in neatly. Check for any gaps or spaces where the fabric doesn't cover the button front and adjust as necessary.
    6. Position the back of the button over the folded fabric. Make sure it is centered.
    7. Using the blue plastic piece of the covered button tool, push down on the back of the button. You should feel it almost snap into place. Sometimes it takes some muscle. You may find that you have to trim a bit more fabric at this point if the back isn't snapping on easily.
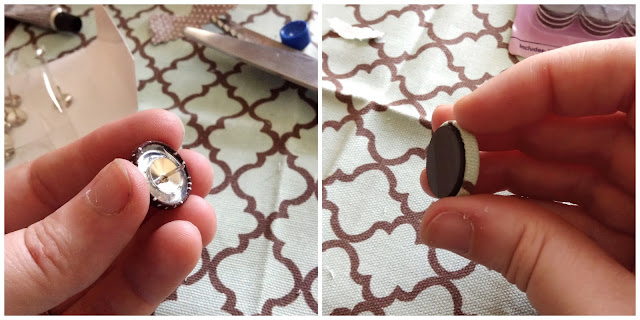
    8. The back of your button should look something like picture 8.
    9. The front of  your button should look something like picture 9.

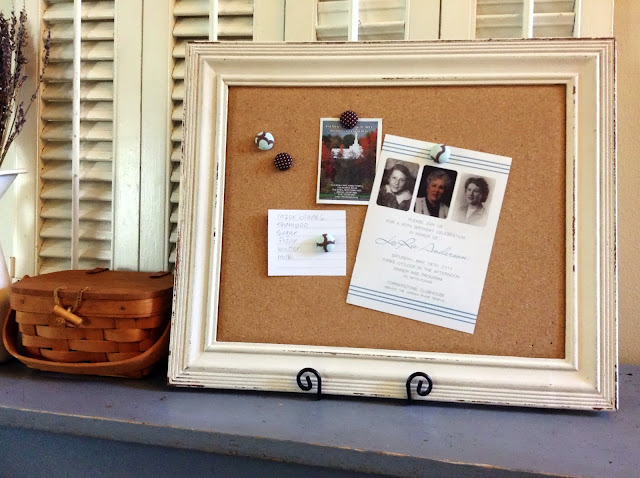
    Now you can choose if you'd like to make pins or magnets. I did both. To make a pin, add a nice-sized glob (very scientific, I know) of E6000 adhesive to the back of the ¾" covered button and simply push the head of the thumbtack into the wet adhesive and let it dry. You may want to let it dry overnight to make sure it is well set. You could use hot glue as well, but the E6000 is more permanent and will hold longer and better.

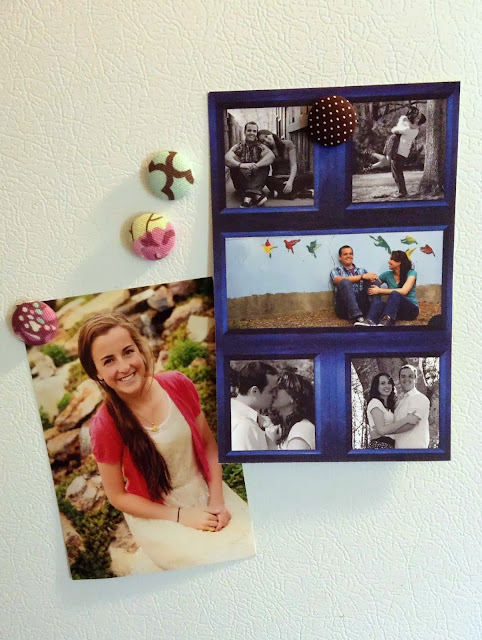
    The magnets are even easier. Just remove the backing of the adhesive magnetic button and push it firmly into the back of the covered button. That's it. It's ready to use.

    These would make a cute gift packaged in a small metal tin or a little bottle. You could use scraps of cloth from a special occasion--a wedding or bridesmaid dress or a baby quilt maybe--to make an extra meaningful gift.

    Covered buttons are fun, easy and quick. I have actually made them using patterned paper and gluing a brad to the back for card-making or scrap-booking as well.

    Our temporary apartment here in New York may still have stacks of unpacked boxes and no place to put them, but at least I have cute magnets on my fridge! Somehow that makes life seem a little better.


    I would love for you to follow me on Facebook, Twitter, Google+, Pintrest and via email.
    I participate in the link parties found
    here.

    This post appeared first on Simply Designing.
    Previous Post: « Adding Color To Your Home {Color My Home Summer Blog Series}
    Next Post: 5 Summer-Inspired Living Room Updates Under $500 »

    Reader Interactions

    Comments

    1. Jill

      August 05, 2013 at 3:30 pm

      These are so cute! I know what you mean about moving! I've just moved into my own condo which was my THIRD move in 6 months. I'm tired of it! lol I'm so glad I can be somewhere permanent now. It's definitely the little things that make the difference!

      Reply
    2. Trista Laborn

      August 09, 2013 at 6:30 pm

      This is NICE! Stopping by from the DIY craft blog hop!

      Reply
    3. Yun Kelly

      August 10, 2013 at 1:45 pm

      Really cute! Thank you for sharing. I'll have to try this for sure!

      Reply

    Leave a Reply Cancel reply

    Your email address will not be published. Required fields are marked *

    Primary Sidebar

    Hello Friends!

    Ashley Phipps Simply Designing I'm Ashley Phipps and I love sharing SIMPLE DIY, home, travel, food, craft and essential oil ideas with you! Learn more about me here. Contact me here. Find Media/PR info here. Privacy is important to us. Please read my Privacy Policy.

    Favorite Posts

    Free Hello Spring Print

    Free Hello Spring Print :: Large

    Spring Berry Basket - such a simple addition to your spring or Easter table

    Spring Berry Baskets


    COPYRIGHT: You’re welcome to link to Simply Designing or use a single image with a brief description to link back to any post. Republishing posts in their entirety is strictly prohibited.  Any use for commercial purposes is strictly prohibited. Feel free to pin on Pinterest. Find out more in my Privacy Policy.  Simply Designing with Ashley Phipps LLC is a participant in the Amazon Services LLC Associates Program, an affiliate advertising program designed to provide a means for sites to earn advertising fees by advertising and linking to Amazon.com . Simply Designing with Ashley Phipps LLC and it’s owner, employees and affiliates are not liable in any way for injury or loss (whether physical, emotional, monetary or any other kind of loss) resulting from any inspiration, ideas, directions or information gained from this website. We advise you to always follow manufacturer instructions, take appropriate safety precautions and hire a professional when in doubt. We love it when you use our site for inspiration, but by using it, you agree that you do so at your own risk.

    Privacy Policy 

    Copyright © 2021